Recipes, Tales and the Journey of a Vegetarian


Wednesday, November 17, 2010

Vegan Jambalaya

Jambalaya is Louisiana’s version of paella.  Traditionally it is made of three parts (meats, vegetables and rice) cooked in stock.  Most often chicken and andouille sausage are used for the meat, though I’ve always preferred Jambalaya made with veggies to its meatier counterparts.  In parts of central Louisiana it’s not uncommon to find the dish made with crawfish, oyster, turtle or alligator.

Cajun and Creole recipes vary from each other in terms of included vegetables.  Cajun Jambalaya uses onion, celery and green bell pepper.  The smoky flavor and brown coloration are a result of sausage cooked in a cast iron pan.  However, the more traditional Creole version, which uses onions, peppers and tomatoes is the one I prefer and, for reasons you can deduce, is more easily adapted to a vegetarian entree.

The wonderful thing about Jambalaya is that is universally a one dish wonder – filling, but quick and easy to make.  What’s more, it’s affordable, calling for a handful of vegetables, rice and dried spices most likely already in your cupboard.  The version detailed below uses summer squash and zucchini, though I have plans to experiment with the addition of vegan sausage.  (I’d love to know if you’ve tried this.)

Enjoy and, as they say in the Crescent City, laissez les bon temps rouler!

Vegetarian Jambalaya 
This make-ahead main or side dish has all the flavor and boldness of traditional jambalaya. If there's any left over, roll it up in a flour tortilla and add your favorite topping!!  Yum!! 
Ingredients
  • 1 medium onion, finely chopped
  • 1 cup chopped celery
  • 1 cup chopped green pepper
  • 1 cup sliced fresh mushrooms
  • 1 zucchini
  • 2 garlic cloves, minced
  • 1 teaspoon olive oil
  • 3 cups chopped fresh tomatoes
  • 2 cups water
  • 1 cup uncooked long grain rice
  • 2 tablespoons reduced-sodium soy sauce
  • 1 tablespoon minced fresh parsley
  • 1/4 teaspoon salt
  • 1/4 teaspoon paprika
  • 1/8 teaspoon cayenne pepper
  • 1/8 teaspoon chili powder
  • 1/8 teaspoon pepper
  • 6 tablespoons reduced fat sour cream (omit if you're going the vegan route)

Directions

  1. In a large nonstick skillet, saute the onion, celery, green pepper, mushrooms, zucchini and garlic in oil until tender. Stir in the tomatoes, water, rice, soy sauce, parsley, salt, paprika, cayenne, chili powder and pepper.
  2. Transfer to a 2-1/2-qt. baking dish coated with nonstick cooking spray. Cover and bake at 350 degrees F for 65-70 minutes or until rice is tender and liquid is absorbed. Top each serving with 1 tablespoon sour cream.
Nutrition Facts: One serving (1 cup) equals 187 calories, 3 g fat (1 g saturated fat), 5 mg cholesterol, 339 mg sodium, 36 g carbohydrate, 3 g fiber, 5 g protein. Diabetic Exchanges: 2 vegetable, 1-1/2 starch, 1/2 fat.

Friday, October 22, 2010

Vegetarian Shepherd's Pie

COMFORT FOOD!!  Here's an amazing recipe that is a delicious, savory, meatless meal that will stick to your ribs.  The "Boca" crumbles in the dish would fool even the most devoted carnivore!  Perfect for the fall/winter weather headed our way!!

Vegetarian Shepherd's Pie

Ingredients

  • 8 large potatoes, peeled and quartered
  • 2 carrots, sliced
  • 1 (16 ounce) package frozen mixed vegetables, thawed
  • 1 package meat substitute crumbles (like Boca)
  • 1/2 teaspoon garlic powder
  • 1/2 teaspoon dried basil
  • 1/2 teaspoon dried parsley
  • 3 tablespoons butter
  • 1/4 teaspoon salt
  • 1/4 teaspoon ground black pepper
  • 6 tablespoons milk
  • 1 onion, chopped
  • 1 teaspoon vegetable oil
  • 1 (19 ounce) can kidney beans, drained
  • 1 (14.5 ounce) can diced tomatoes, drained
  • 1 (8 ounce) can tomato sauce
  • 1 teaspoon soy sauce
  • 1/2 teaspoon white sugar
  • 1 cup shredded Cheddar cheese
  • 1/2 teaspoon paprika

Directions

  1. Preheat oven to 375 degrees F (175 degrees C).
  2. Cook potatoes, covered, in a small amount of boiling water until tender. Drain and mash.
  3. While potatoes are cooking, steam or boil carrots and mixed vegetables until near tender. Drain and set aside.
  4. In a small saucepan, cook garlic powder, basil and parsley in butter or margarine for about 20 seconds (or microwave for 10 seconds). Stir into mashed potatoes along with salt and pepper. Gradually beat in enough milk to make potatoes light and fluffy, add a little more milk if necessary. Set aside
  5. In a medium saucepan, cook onion in oil until tender but not brown. Stir in boca crumbles, kidney beans, tomatoes, tomato sauce, soy sauce, sugar and vegetable/carrot mixture. Heat through until bubbly.
  6. Transfer vegetable mixture to a 8x8x2 inch baking dish. Drop mashed potatoes in mounds over the top. Sprinkle with cheese and paprika. Bake, uncovered at 375 degrees F (175 degrees C) for 30 minutes. 
NUTRITION INFO:  Amount Per Serving  (serves 6) Calories: 386 | Total Fat: 8.4g | Fiber: 21.4g | Cholesterol: 36mg

Wednesday, October 20, 2010

What your body does within 1 hour of drinking soda......

In my current quest to become a Certified Nutritionist I've become even  more aware of our world of food and drink.  I want to know what happens IN our bodies once we consume something as well as how the item being consumed is made.  So in my constant search for a healthier lifestyle for my family and I, I started looking into the expansive world of soda.  While my kids don't drink it (in fact, the one time my daughter tried it, she thought it was disgusting and spicy.......) My partner and I do on occasion. Now, everyone knows what soda is, right??  A soft drink (also referred to as soda, pop, soda pop or fizzy drink) is a non-alcoholic beverage typically containing water and a flavoring agent. Many are carbonated and sweetened, and may contain additional ingredients such as fruit juice. Small amounts of alcohol may be present, but the level would generally remain under 0.5% of the total volume for the drink to be considered non-alcoholic. Soft drinks are most often consumed chilled, and sometimes at room temperature.


I've always wondered why soda is called a "soft drink."   Wikepedia explains that "The adjective "soft" is employed in opposition to "hard", the latter being used in reference to drinks with a high alcohol content. Further, soft drinks are not thought of as containing milk or other dairy products."  Many carbonated soft drinks sweetened with sugar or high fructose corn syrup and are available in diet versions sweetened instead with non-caloric sweeteners.

Now don't get me wrong, I do enjoy pop.  But I also feel like if it's regular, NON-diet soda it's like fat-building-crack-in-a-can and if it's DIET, it's cancer-in-a-can.  So as good as it may be in all of its deliciousness, I think it's time to give it the boot.    

According to the Nutrition Research Center, this is what happens to your body within 1 hour of drinking a can of soda:
 -10 minutes: 10 teaspoons of sugar hit your system, which is 100 percent of your recommended daily intake. You’d normally vomit from such an intake, but the phosphoric acid cuts the flavor.
-20 minutes: Your blood sugar skyrockets. Your liver attempts to maximize insulin production in order to turn high levels of sugar into fat.
-40 minutes: As your body finishes absorbing the caffeine, your pupils dilate, your blood pressure rises, and your liver pumps more sugar into the bloodstream. Adenosine receptors in your brain are blocked preventing you from feeling how tired you may actually be.
 -45 minutes: Your body increases dopamine production, causing you to feel pleasure and adding to the addictiveness of the beverage. This physical neuro response works the same way as it would if we were consuming heroin.
>60 minutes: The phosphoric acid binds calcium, magnesium and zinc in your lower intestine, which boosts your metabolism a bit further. High doses of sugar and artificial sweeteners compound this effect, increasing the urinary excretion of calcium. The caffeine’s diuretic properties come into play. (You have to GO!) Your body will eliminate the bonded calcium, magnesium and zinc that was otherwise heading to your bones. And you will also flush out the sodium, electrolytes and water. Your body has eliminated the water that was in the soda. And in the process it was infused with nutrients and minerals your body would have otherwise used to hydrate your system or build body cells, bones, teeth.
-60 minutes: The sugar crash begins. You may become irritable and/or sluggish. You start feeling like crap.

Time to grab another?

Wednesday, September 22, 2010

The "Eggsperience"

So I've done a lot of research into the wonderful world of EGGS.  While I hardly eat them (I really only use them in baking......) I can't seem to cut them completely out of my life.  It's quite possible that I'm just not trying hard enough as there are many alternatives.  And while I do feel guilty every time I crack an egg open,   I rationalize to myself that they're "free-range" or "cage free."  I'm here to inform you that there is a BIG distinction between the two.

I've had a few people proudly tell me that they only buy cage-free eggs and free-range poultry.  After all of the info I've found, I'm interested to hear what people say they think these terms mean.  As I expected, all of them had images in their heads of green pastures, with plump, clucking chickens running about, and big, red barns in the back drop. Okay, so no one described the barn, I just thought it fit with the images they'd created. Anyway, after realizing the knowledge deficit that exists surrounding the definition of the terms free-range and cage-free, I decided to devote this entry to dispelling the myth behind them. A myth, perpetuated by the meat industry, that provides consumers with a false sense of comfort regarding the care and consideration of chicken and other poultry on factory farms. 
 
Let me begin by citing the USDA's definition of the terms. First, there is no legal definition for the term "cage-free." The USDA has no regulatory policy regarding cage-free eggs. Usually, cage-free eggs are ones that come from hens that, instead of being kept in overcrowded cages, are housed in large overcrowded sheds. Typically, there are so many birds packed in one of these sheds that the hens are unable to flap their wings. These birds still have their beaks cut off with a hot blade and no pain killers. They live in sheds soaked with urine and shuffle around in their own feces. Most often, sick birds are left to die because they receive no veterinary care (providing veterinary care costs the farmer more than replacing the bird does). After they've died, their corpses are left to rot in the shed alongside the egg-laying hens that provide the consumers with cage-free eggs.  

Unlike the term "cage-free," the USDA does have a requirement that must be met in order to earn the certification of "free-range." According to USDA policy, in order to be certified as free-range, birds must be raised with access to the outdoors and provided a traditional high-protein diet. The policy states that the birds may be temporarily confined for reasons of health, safety, the animal's stage of production, or to protect soil or water quality. For many free-range chickens, the access to the outdoors they receive is when they are transported to the windowless chicken sheds and then again when they are removed from the shed for slaughter. The USDA offers no specifications as to how much outdoor exposure the birds must receive nor is there any way to enforce such a requirement even if it was mandated. Also, it is important to note that male chickens born on cage-free or free-range farms suffer the same fate as the ones born in the battery cages, that is, the male chickens are killed because they cannot lay eggs and are of no use to egg-producing farmers. The male chickens are usually killed in one of three ways- They are crushed to death, literally, like the way my brother used to squash aluminum cans. They are thrown in large plastic bags and suffocated to death. Or, they are thrown, still alive, into a grinder to be processed as feed. 

So what's a consumer supposed to do if he/she doesn't want to give up eggs but doesn't want to support the cruel industry of factory egg production? The best but not always possible choice?? Find a local farmer. Go see the chickens who'll provide you with your eggs. See where they're housed, what kind of physical condition they're in, if their beaks are intact or have been cut off. By the way, farmers trim the beaks of chickens because when kept in such unnaturally close quarters, the chickens will peck each other to death. If you visit a farm and the chickens have had their beaks trimmed, go somewhere else. 

The next best thing is to try to buy eggs from a farmers market.  If that's not possible then switch from commercially raised eggs to buying those labeled "Certified Humane," "American Humane Certified," or "Animal Welfare Approved." This means your eggs came from chickens raised with care, not confined to battery cages and stuffed with weird growth hormones or antibiotics. And these three designations are verified and monitored by animal rights organizations. In other words, they have some oomph behind them, unlike popular claims like "cage-free," which does not.

Most importantly, do your own research. The facts are out there, you just have to want to find them - I know I did!!!  I guess that would make me an "Eggspert??" ;-)

Monday, August 16, 2010

Yummy in our tummy!

Here are some new recipes that we just LOVE!!  I love to hear feedback so if you give them a whirl, let me know how you like them.  If you try something different or find a trick that works for you, let us all know!!

The recipes featured in this post are:
  • Spinach & Artichoke Pasta
  • Tomato & Basil Tart (we just had that tonight and it was out of this world!!)
  • Almond Poppyseed Bars
The recipes are in this order so scroll down to get the ones you like!

Spinach & Artichoke Pasta
Ingredients

  • 1 pound semolina or whole wheat penne
  • 2 tablespoons Olive Oil
  • 3 tablespoons butter
  • 1 medium onion, finely chopped
  • 3 cloves garlic, finely chopped or grated
  • 3 tablespoons flour
  • 1/2 cup white wine
  • 2 cups milk 
  • Salt
  • Freshly grated nutmeg, about 1/4 teaspoon or to taste
  • 1 10-ounce box frozen chopped spinach, defrosted and wrung dry in a kitchen towel
  • 1 10-ounce box frozen chopped artichokes, defrosted and wrung dry in a kitchen towel
  • Black pepper
  • 1 1/2 cups shredded Italian Fontina cheese, plus additional for sprinkling on top
  • 1 1/2 cups grated Parmigiano Reggiano cheese, plus additional for sprinkling on top

    Yields: 4 servings

    DIRECTIONS

    Bring a large pot of water to a boil for pasta, salt water and cook pasta to al dente.
    While the pasta water comes to a boil, place a medium pot over medium-low heat with 2 turns of the pan of olive oil, about 2 tablespoons, and the butter. Add the onion and garlic to the pan and cook the veggies until very soft, about 10 minutes. Then heat the broiler and position rack in the middle of the oven.

    Turn the heat up to medium-high and sprinkle the flour into the pan. Cook for about 1 minute then whisk the wine into the pan, cooking for another minute to burn off the alcohol. Whisk the milk into the pan and bring up to a bubble. Add the nutmeg, spinach, artichokes, salt and pepper to the sauce and simmer until thickened and vegetables are warmed through, 2-3 minutes more. Add 1 cup of each of the cheeses to the sauce and stir until melted.

    Tomato & Basil Tart
    This dish actually doesn't have that many ingredients
    but the flavor is amazing!!!


    • Ingredients

    • 2/3 cup whole wheat flour
    • 1/3 cup all-purpose flour
    • 1/2 cup cold butter
    • 4 to 5 tablespoons cold water
    • 6 ripe tomatoes - sliced
    • 3 cups (12 ounces) fresh mozzarella cheese
    • 2 crushed garlic cloves
    • 1/2 cup fresh basil leaves, dipped in olive oil
    • 4 tablespoons olive oil
    • 1/4 teaspoon salt
    • 1/8 teaspoon pepper

      Directions

      • In a large bowl, combine the flours; cut in butter until crumbly. Gradually add water, tossing with a fork until dough forms a ball. Cover and refrigerate for 30 minutes or until easy to handle. If you're short on time, **YOU COULD ALSO USE A REFRIGERATED PIE CRUST**
      • On a lightly floured surface, roll out pastry to fit a 9-in. fluted tart pan with a removable bottom. Transfer pastry to pan; trim even with edge. Bake at 350° for 13-15 minutes or until lightly browned. Meanwhile, thinly slice the tomatoes; place on paper towels to drain.
      • Slice mozzarella cheese and layer onto the crust; top with tomatoes arranging the slices in a slightly overlapping pattern around edge of tart. Sprinkle garlic over tomatoes & cheese.
      • Drizzle with oil; sprinkle with salt and pepper.
      • Bake for 30-35 minutes or until crust is crispy and cheese is melted. Let stand for 15 minutes before serving. Yield: 6-8 servings.
      LEMON POPPYSEED BARS

      Ingredients

      • 3 eggs
      • 2 1/4 cups sugar
      • 1 1/2 cups milk
      • 1 cup vegetable oil
      • 1 1/2 teaspoons almond extract
      • 1 1/2 teaspoons vanilla extract
      • 1 1/2 teaspoons butter flavoring or additional vanilla extract
      • 3 cups all-purpose flour
      • 4 1/2 teaspoons poppy seeds
      • 1 1/2 teaspoons baking powder
      • 1 1/2 teaspoons salt
      • FROSTING:
      • 1/3 cup butter or margarine, melted
      • 3 cups confectioners' sugar
      • 3 tablespoons milk

      Directions

      1. In a mixing bowl, beat the eggs, sugar, milk, oil, extracts and butter flavoring. Combine the flour, poppy seeds, baking powder and salt; add to the egg mixture and mix just until combined. Spread into a greased 15-in. x 10-in. x 1-in. baking pan. Bake at 350 degrees F for 20 minutes or until a toothpick inserted near the center comes out clean. Cool on a wire rack.
      2. In a mixing bowl, combine the frosting ingredients; beat until smooth. Frost bars.

      Wednesday, July 28, 2010

      Raising Vegetarian Children in a Meaty World.....

      Recently, our daughter came to us and asked what meat was.  We told her plainly and simply that it is an animal.  It all started because she was very upset by seeing the fish at the seafood counter.  She said, "Why are they sad?" as all the fish had frowns - it's true! While explaining this to her, we didn't want to freak her out about but at the same time, tried to explain to her why WE don't eat meat.   It's a tricky subject to tackle at this age.  We just want to teach our kids that animals are living, breathing, sentient beings. Teach compassion and respect.  They don't need to know about mistreatment, etc at this age nor do we want them to judge others for eating meat.  Just this afternoon, my almost 4 year old daughter was playing in her kitchen and she began to serve up cows and chickens from her puzzles on her tiny play plates as a joke, handing them to me and then giggling, “we don’t eat ANIMALS mommy!” As if the concept was so foreign it was laughable.


      Trying to reiterate that it's a personal decision and steering from saying things like, "eating meat is mean," or "we don't eat animals because it's not nice or because it hurts them"  isn't a message we want to send as many loved ones in our lives DO eat meat.   We just believe that if we teach them to love animals and not to think of them as "things" to be used, being vegetarian should be a natural choice for them...or so we hope.  I've never been one to force my beliefs on anyone, so if our children grow up to have a taste for meat, I will not protest.  On the other hand, some kids grow up with meat-eating parents and choose to be a vegetarian (like me!) Now, I was lucky- my mom was extremely supportive and provided plenty of alternative proteins and salads. Not all parents share that view, unfortunately, and even forced their children to eat meat (sometimes, by adding meat juice to otherwise vegetarian meals to trick their children.)


      Another concern we run into is making sure our kids are getting a balanced diet.....which is tricky enough as little kids an be such picky eaters.   One needs to make sure that your child is getting the vitamins and nutrients they need.  If one does their homework, raising a child as a vegetarian can be easy as there are other ways to get protein without spending tons of money (beans, nuts, etc..) Here are some tips to make sure your child's veggie diet is on track......
      • Understand what foods need to be substituted in the diet as energy, protein and vitamin sources may need to be ‘topped up’.
      • Encourage your child to eat a wide variety of foods.
      • Alternate wholegrain and refined cereal products.
      • Combine lower energy vegetarian foods, such as vegetables, with higher fat foods: for example, vegetable fritters.
      • Increase the energy value of food by the use of nut butters, avocado, full fat dairy products, fat spreads and oils.
      • Give your child regular meals and snacks.
      • Combine foods containing vitamin C with foods that are high in iron. For example, offer an orange with baked beans on toast. Vitamin C enhances the absorption of iron.

      Now we are united on the dietary front as a family, and I am beyond thrilled.  My partner has been doing an amazing job sticking to the veggie lane (going on 4 months!) and really think that watching Food, Inc and reading "Eating Animals" was key.  If you haven't seen or read these items, do!!

      Raising healthy vegetarian children is possible and is not difficult once a parent has done some simple research. Each person who chooses to become a vegetarian should do his or her own research. Take your standard food chart and simply substitute vegetarian or vegan alternatives making sure your child gets the recommended number of servings. When looked at in this way, it becomes clear that the task at hand is really no more difficult than feeding your average picky toddler. Resources exist in many forms available to anyone willing to peruse the magazine or nutrition/cookbook section of the local bookstore, spend an evening surfing the Internet, or contact a local national vegetarian organization. A vegetarian diet for children can not only be adequate but also abundantly healthful.

      Saturday, July 3, 2010

      The Search Is Over......

      ....for a delicious, easy, zucchini bread recipe :-)  I'm happy to say I have found a recipe that lives up to my idea of what these this bread should taste like!


      While shopping at the Farmers Market last week, I bought some 'golden' zucchini as well as some green.  Having an overabundance of them (how can you say no to HUGE homegrown zucchini 2 for $1?! Ok. I guess one could.  But not I!) I had to figure out what to do with all of it.  I threw it in every dish I could throughout the week and still had a bunch left over.  Fresh zucchini should be used up within 5 days. You can freeze it by peeling off the skin and shredding the pulp.  Measure out 2 cups of pulp and place in a zipper closure bag. Purge the air out of the bag and seal shut.  However, I didn't feel like freezing it so, I decided to give zucchini bread another shot.  I've tried other recipes in the past only to find them dry, bland and never 'zucchini' tasting.  But this one I tried today is a keeper!! 

      Zucchini bread is made with shredded zucchini and a number of other ingredients that provide a sweet flavor and moist texture. I used the Golden Zucchini which has a mild, sweeter taste than the green. There are many variations of zucchini bread and some are savory rather than sweet, due to ingredients such as cheese and chopped onions. Like many other quick breads, zucchini bread is often served as a dessert bread or breakfast item.

      I have also found that with many homemade baked breads, they are sooo much better the next day.  Wrap them up (once cooled) in some foil and stick them in a ziplock bag or another airtight container.  The bread will be super moist, soft and delish!!  You can also freeze completely baked loafs by wrapping them in plastic wrap followed by aluminum foil. Label and freeze for up to 3 months.


      Golden Zucchini Bread

      Ingredients

      • 2 cups all-purpose flour
      • 1 cup whole wheat pastry flour (or if you don't have this on hand, all-purpose is fine)
      • 1 teaspoon salt
      • 1 teaspoon baking soda
      • 3 teaspoons ground cinnamon
      • 1/4 teaspoon baking powder
      • 3 eggs
      • 2 cups white sugar
      • 3 teaspoons vanilla extract
      • 1 cup vegetable oil
      • 3 cups grated green or golden zucchini
      • 1 cup chopped walnuts (optional)

      Directions

      1. Preheat oven to 350 degrees F (175 degrees C).
      2. Sift together flour, salt, soda, cinnamon, baking powder.
      3. Beat eggs. Add and mix well sugar, vanilla, and oil. Add zucchini to egg mixture. Add dry ingredients, mixing well. Stir in nuts if desired. Pour into 2 ungreased loaf pans.
      4. Bake at 350 degrees F (175 degrees C) for 1 hour.

      Tuesday, June 15, 2010

      Cupcakes are vegetarian too!!!

      Last night I was thinking, "Why don't I include some sweet recipes on the blog?? After all, baking IS one of my passions!"  Plus, unless you're baking meat pies, most desserts are vegetarian......SCORE!

      I tend to be a baking snob. Most of the time, I'd rather bake it myself than go to another disappointing bakery.  Nothing gets under my skin like spending a good amount of $$ at a bakery only to find I could've made it better. (Yes, I know.....I'm tooting my own horn....)

      A friend of mine messaged me asking for some recommendations for cupcake recipes for her daughters upcoming 2 year birthday.   Since I just made RED VELVET cupcakes yesterday, I thought I'd pass the yumminess along to you all!  Also, I've included a favorite recipe of Amanda's, Carrot Cupcakes with White Chocolate Cream Cheese Frosting.  TO. DIE. FOR.

      Enjoy!!!


      RED VELVET CUPCAKES WITH CREAM CHEESE FROSTING
       Ingredients
      (Makes 24 servings)
      • 2 1/2 cups cake flour
      • 1/2 cup unsweetened cocoa powder
      • 1 teaspoon baking soda
      • 1/2 teaspoon salt
      • 1 cup butter, softened
      • 2 cups sugar
      • 4 eggs
      • 1 cup sour cream
      • 1/2 cup milk
      • 1 (1 ounce) bottle Red Food Color (like McCormick)
      • 2 teaspoons Vanilla Extract
      • Vanilla Cream Cheese Frosting:
      • 1 (8 ounce) package cream cheese, softened
      • 1/4 cup butter, softened
      • 2 tablespoons sour cream
      • 2 teaspoonsVanilla Extract
      • 2 cups Confectioners Sugar

      Directions

      1. Preheat oven to 350 degrees F. Mix flour, cocoa powder, baking soda and salt in medium bowl. Set aside.
      2. Beat butter and sugar in large bowl with electric mixer on medium speed 5 minutes or until light and fluffy. Beat in eggs, one at a time. Mix in sour cream, milk, food color and vanilla. Gradually beat in flour mixture on low speed until just blended. Do not overbeat. Spoon batter into 30 paper-lined muffin cups, filling each cup 2/3 full.
      3. Bake 20 to 25 minutes or until toothpick inserted into cupcake comes out clean. Cool in pans on wire rack 5 minutes. Remove from pans; cool completely. Frost with Vanilla Cream Cheese Frosting.
      Vanilla Cream Cheese Frosting
      Beat cream cheese, softened, butter, sour cream and Vanilla Extract in large bowl until light and fluffy. Gradually beat in confectioners' sugar until smooth.  Yummmm!!!
       ____________________________________________
      CARROT CUPCAKES WITH WHITE 
      CHOCOLATE CREAM CHEESE FROSTING 


      Ingredients

      Makes 12 servings

      • 2 ounces white chocolate
      • 1 (8 ounce) package cream cheese, softened
      • 1/2 cup unsalted butter, softened
      • 1 teaspoon vanilla extract
      • 1/2 teaspoon orange extract
      • 4 cups confectioners' sugar
      • 2 tablespoons heavy cream
      • 2 eggs, lightly beaten
      • 1 1/8 cups white sugar
      • 1/3 cup brown sugar
      • 1/2 cup vegetable oil
      • 1 teaspoon vanilla extract
      • 2 cups shredded carrots
      • 1/2 cup crushed pineapple
      • 1 1/2 cups all-purpose flour
      • 1 1/4 teaspoons baking soda
      • 1/2 teaspoon salt
      • 1 1/2 teaspoons ground cinnamon
      • 1/2 teaspoon ground nutmeg
      • 1/4 teaspoon ground ginger
      • 1 cup chopped walnuts

      Directions

      1. Preheat oven to 350 degrees F (175 degrees C). Lightly grease 12 muffin cups.
      2. In small saucepan, melt white chocolate over low heat. Stir until smooth, and allow to cool to room temperature.
      3. In a bowl, beat together the cream cheese and butter until smooth. Mix in white chocolate, 1 teaspoon vanilla, and orange extract. Gradually beat in the confectioners' sugar until the mixture is fluffy. Mix in heavy cream.
      4. Beat together the eggs, white sugar, and brown sugar in a bowl, and mix in the oil and vanilla. Fold in carrots and pineapple. In a separate bowl, mix the flour, baking soda, salt, cinnamon, nutmeg, and ginger. Mix flour mixture into the carrot mixture until evenly moist. Fold in 1/2 cup walnuts. Transfer to the prepared muffin cups.
      5. Bake 25 minutes in the preheated oven, or until a toothpick inserted in the center of a muffin comes out clean. Cool completely on wire racks before topping with the icing and sprinkling with remaining walnuts.  
      6. Eat.....Soooo amazing!!!

      Wednesday, June 9, 2010

      "What a Dal"

      Since it's been so hot and sticky out, I wasn't in the mood for turning on the oven or cooking over a hot stove.  Come to think of it, it's surprising that the thought of eating a warm dal dish sounded like a good idea.  However, after coming across a "Slow Cooker" cookbook at the library, I was inspired to give this dal recipe a whirl! 

      I never really appreciated a good dal until I started making them at home myself. If you've eaten dal at Indian restaurants, you know that they're usually served as a side dish, and can range from being very watery and soup-like to dry and dense, like mashed potatoes. They make excellent meatless main courses, delicious and nutrient rich. But perhaps the dal you've experienced has been too watery, too bland, or just too uninspired to drive you into the kitchen to create your own.  Or, maybe indian food isn't your thing.  At any rate,  I feel like there are 1000 different variations to try and what a great opportunity to explore!

      So, what's a dal you ask?   They usually consist of dried legumes such as lentils, split peas, and some kind of bean.  They are typically served as side dishes because if As side dishes the meal is spicy hot, you may want a mildly seasoned, bland dal to offset the heat and balance the flavors. Or, if you're serving the dal as a main course, accompanied by rice and bread, you may prefer a robust dal, with lots of ginger, chiles, and roasted spices to highlight it as the center of the plate.

      I've come to consider dal a comfort food. There is something immensely satisfying about grains and beans together. Whenever I eat a good vegetarian chili, or minestrone soup I feel good & toasty inside.  It's hearty (without making you feel too full), nutritious and super easy to make.  If you're in the mood for a quick, easy, yummy dal - this recipe has your name on it :_)

      I serve it with brown basmati rice with a spritz of lemon and a dollop of yogurt at table add extra tang. As with other legume dishes, dal freezes beautifully, so reheating a batch requires almost no labor. It's a great idea to keep a quart or so frozen so it's readily available for easy dinners or to take lunch to work.


      LENTIL DAL 

        Ingredients
      • 2 cups Dried Red Lentils, rinsed & sorted
      • 3-4 Garlic Cloves, minced
      • 1-2 tablespoon Fresh Ginger, finely chopped
      • 1 (10 ounce) package Frozen Spinach
      • 1 tablespoon Curry Powder (to taste)
      • 1 teaspoon Ground Cumin (to taste)
      • 1 teaspoon Ground Corriander (to taste)
      • 1 teaspoon Yellow Mustard Seeds (to taste)
      •  Red Pepper Flakes(to taste)
      •  Ground Cinnamon(to taste)
      • 4 cups low sodium vegetable broth
      • Water, as needed

      Directions

      1. Just toss it all in there and cook on low 6-8 hours. check water level a few times to make sure lentils don't burn, add water if needed.  Serve with warm naan if you'd like!

      Thursday, May 13, 2010

      I learn something new everyday.....

      So during my time of being a vegetarian, I've learned a lot about the food we buy that is 'considered' to be humane or vegetarian.  Some of it was shocking to find out.  Here are some key products that flew under my radar until recently.....
      • For the longest time, I never knew there was such a things as "Vegetarian Cheese."  Some cheeses are made with an ingredient from the stomachs of slaughtered calves and vegetarian cheese uses vegetable-derived rennet. Every supermarket now stocks at least one kind of vegetarian cheese, and many of the more unusual varieties such as Stilton and Brie are also now available in vegetarian versions. 
      • A Fruitarian exists! — A person who follows a vegan diet, but only eats foods that don’t kill the plant.  For example, picking apples does not kill the tree, but you cannot have carrots without killing the plant. Wow - I thought I made this term up years ago when I was just goofing around! I used to say that  "At least animals can run & roam......vegetables roots are shackles to the ground....."  Looks like some people out there really believe that.  Huh.   
      • Cage Free vs Free Range - “Free Range,” “Cage Free,” “Organic”…what does it all mean? Marketing labels are perhaps the most confusing part of this whole “eating humanely/healthy” game. So what do the various terms you see on the packages mean?
      1. Conventional (i.e., no special label) – Typically less than half a square foot of space per hen, giving not even enough room to spread their wings. 
      2. Cage Free – As it says, the hens are able to move about inside a barn without being confined to cages. A better life, but not optimal as parts of beaks are often burned to prevent pecking at themselves and others (a sign of distress, by the way).
      3. Free Range – Implies chickens on lush green pastures. Actually is not a regulated term for eggs so this can be used by absolutely anyone. Really all that’s needed is a door to the outside that gives the chickens “access” to an outdoor area, whether they actually use it or not. This is a meaningless term.
      4. Organic – This means the hens were fed organic feed, whatever that feed consists of. I think it also means no animal by-products in the feed.
      5. Vegetarian – The hen is fed a vegetarian feed. I only mention this to point out that chickens are omnivores, not vegetarians, and will naturally eat bugs, grubs, etc. This term is used to imply “healthier” in our anti-meat culture.
        As you can see, few of the terms on the egg carton actually mean a whole lot. Other than “organic” and “vegetarian,” it’s pretty useless. But there’s one more term that actually means what you want it to mean. “Pastured” means the chickens were raised on pasture, with access to the sun, grass, bugs, and possibly supplemented with grains and other feed.  That's what I'm gonna keep my eyes open for from now on!

        Ok!  Now for the fun stuff - the recipes!!!
        I've made a bunch of new things I'm excited about!!  The first is yogurt, which I've been making for years now.  When I was pregnant, I started getting serious migraines anytime I ate what I narrowed down to, yogurt.  After lots of investigating,  I concluded that it was the amount of live active cultures in it that was triggering my headaches.  So I started making my own which is super easy & sooo much better than what you'd get at the store.  Plus then you can flavor it with whatever you'd like!  I have a yogurt maker (it's relatively inexpensive - check it out - my yogurt maker) and saves $$ in the long run - especially if you buy organic yogurt. However, you can make yogurt without a special "maker."  You just need the right tools.  Here is a great resource for how to make yogurt with things you have around your kitchen (including using a microwave!)  Yogurt Making Tips

        Homemade Yogurt Recipe

        4 cups of fresh, organic 2% milk (You can use skim or 1% as well)
        1/3 cup of powdered milk
        1/2 cup organic yogurt (this will be your starter - I use greek yogurt since it has less cultures. Once you have your batch of yogurt made, make sure to save some to use as a starter next time or you can use a yogurt starter like "Yogourmet."
        Making yogurt begins with milk. I buy organic milk that is fresh as possible. Slowly heat the milk on the stove over low-medium heat.

        this point you can choose to add powdered milk. Powdered milk creates thicker yogurt that takes less time to ferment. It's optional if you are using whole milk or two percent. Some skim and one percent milk include added milk proteins which make the product taste less watery and will behave the same way as if you added powdered milk.

        For your first batch use two-percent milk plus 1/3 cup of powdered milk. This combination of milk with the powder will produce a delicious, basic yogurt.

        The most tedious thing about making yogurt is watching the milk get hot. You need it to hit 170 degrees, but not have it boil. So you want to pay attention to the pot and have a thermometer at hand. Once you've hit the target temperature, remove from heat and then wait for the milk to cool. Unless you put the pot in the refrigerator it will take some time to cool to 108-112 degrees.

        If you are using existing yogurt as a starter, have it handy in a cup. When the milk is cooled to the proper temperature, mix a small amount it in with the yogurt. This will break up the yogurt and makes blending it with the rest of the milk easier. Once you add the starter, the milk can be placed in the pre-heated yogurt maker for four to eight hours. Refrigerate before serving. Makes one quart.  Enjoy!

         VEGETARIAN KORMA


        This was by far one of the best dishes I've made in a long time.  Indian can be tricky to get right at home but, this recipe is a keeper.  After a few tweaks, I made it my own and made it DELICIOUS!  My brother (a carnivore ;-) and his daughter were over and he loved it too!! 

        I am listing the original recipe but included my changes below......

        Ingredients

        • 1 1/2 tablespoons vegetable oil
        • 1 small onion, diced
        • 1 teaspoon minced fresh ginger root
        • 4 cloves garlic, minced
        • 2 potatoes, cubed
        • 4 carrots, cubed
        • 1 fresh jalapeno pepper, seeded and sliced (I omitted)
        • 3 tablespoons ground unsalted cashews
        • 1 (4 ounce) can tomato sauce (I used 8 oz)
        • 2 teaspoons salt
        • 1 1/2 tablespoons curry powder
        • 1 cup frozen green peas
        • 1/2 green bell pepper, chopped
        • 1/2 red bell pepper, chopped
        • 1 cup heavy cream (I used coconut milk)
        • 1 bunch fresh cilantro for garnish

        Directions

        1. Heat the oil in a skillet over medium heat. Stir in the onion, and cook until tender. Mix in ginger and garlic, and continue cooking 1 minute. Mix potatoes, carrots, jalapeno, cashews, and tomato sauce. Season with salt and curry powder. Cook and stir 10 minutes, or until potatoes are tender. (This took about 20-25 minutes for me.....)
        2. Stir peas, green bell pepper, red bell pepper, and cream into the skillet. Reduce heat to low, cover, and simmer 10 minutes. Garnish with cilantro and serve over basmati rice.
        I had to use a full 8oz can of tomato sauce or it got too dry & also used 8 oz of vegetable broth while the potato mixture cooked.   I also left out the jalapeno and used coconut milk instead of cream and added some garam masala (about a teaspon).  I served it over brown basmati rice.  Will definitely make this one again and next time I'll throw in some sweet potatoes and cauliflower :-)

        THE VERDICT:

        Vic: "By far the best curry dish I've ever made.  Awesome.
        "

        Amanda: "Kormatastic!!" (I don't make these up - she really says stuff like this....lol)

          Monday, May 3, 2010

          30 Days Later........

          annnnd Amanda has chosen to go meat-free for good!!! 

          When I told her that today was her 1 month vegetarian anniversary, she couldn't believe it!  She said, "In that case, this is EASY!"  That was so wonderful to hear!!  So from time to time, I'll continue stories about our journey, recipes we love, and info I find useful. 

          The most common question I've gotten lately is why Amanda decided go become a vegetarian.  I've never believed that it was my place to force my values as it's a highly personal and individual decision to make. But in a survey I recently read, it said that the majority of people  gave up meat and fish because they did not morally approve of killing animals, or because they objected to the ways in which animals are kept, treated and killed for food. 

          With the growing awareness of the importance of healthy food, many people are also becoming vegetarian because it matches the kind of low fat, high fiber diet recommended by dieticians and doctors. Concern about the environment is another factor as people become more aware of the effect raising animals for their meat is having on the environment. Or you may be concerned about wasting world food resources by using land to raise animals for meat instead of growing crops that can feed more people directly.

          Someone asked me what it meant that we were vegetarian now.  They thought we didn't eat any dairy either.  That got me thinking of the many differences there are in the meat-free spectrum.  Here's some info on vegetarianism that explains the differences a little more.........

          For much of the world, vegetarianism is largely a matter of economics: Meat costs a lot more than, say, beans or rice, so meat becomes a special-occasion dish (if it's eaten at all). Even where meat is more plentiful, it's still used in moderation, often providing a side note to a meal rather than taking center stage.

          In countries like the United States where meat is not as expensive, though, people choose to be vegetarians for reasons other than cost. Parental preferences, religious or other beliefs, and health issues are among the most common reasons for choosing to be a vegetarian. Many people choose a vegetarian diet out of concern over animal rights or the environment. And lots of people have more than one reason for choosing vegetarianism.

          Vegetarian and Semi-Vegetarian Diets

          Different people follow different forms of vegetarianism. A true vegetarian eats no meat at all, including chicken and fish. A lacto-ovo vegetarian eats dairy products and eggs, but excludes meat, fish, and poultry. It follows, then, that a lacto vegetarian eats dairy products but not eggs, whereas an ovo vegetarian eats eggs but not dairy products.

          A stricter form of vegetarianism is veganism (pronounced: vee-gun-izm). Not only are eggs and dairy products excluded from a vegan diet, so are animal products like honey and gelatin.  Or avoids lanolin, beeswax & carmine in bath & beauty products....like Lotions & Potions!

          So we officially have a vegetarian family!!  Here are two of our favorite recipes from the past month.  I'll post some more of our favorites soon!!  Enjoy!


          Vegetarian Paella
          Having never tried paella, I think it turned out quite yummy! 

          Ingredients

          • 8 vine-ripened plum tomatoes
          • Kosher salt
          • 1/4 cup extra-virgin olive oil, plus more for drizzling
          • 1 small onion, finely chopped
          • 3 cloves garlic, finely chopped
          • 1 1/2 teaspoons paprika
          • 1/4 teaspoon cayenne pepper
          • 1 teaspoon saffron threads
          • 1 large bulb fennel, cut into 8 wedges (I left this out)
          • 8 baby artichokes, trimmed and halved (I used canned)
          • 1 large Japanese eggplant, cut into 2-inch pieces
          • 4 ounces shiitake mushrooms, stemmed
          • 2 cups dry white wine
          • 2 1/2 cups short-grain paella rice
          • 4 ounces string beans, halved if large
          • 1/4 cup capers, drained
          • 1/4 cup piquillo or roasted red peppers, cut into strips
          • Chopped fresh parsley, for garnish (optional)

          Directions

          1. Preheat the oven to 450 degrees. Core the tomatoes, cut into wedges and place in a medium bowl; season with salt, drizzle with a bit of olive oil and toss. Set aside.
          2. Heat 1/4 cup olive oil in a 12-inch ovenproof skillet or a paella pan over medium-high heat. Add the     onion, garlic, paprika, cayenne and saffron and season with salt. Cook, stirring occasionally, until the onion softens, about 5 minutes.
          3. Add the fennel wedges and cook until lightly browned on one side, about 5 minutes. Flip the fennel and add the baby artichokes and eggplant to the skillet; cook until slightly tender, about 4 more minutes. Add the mushrooms and cook for 1 to 2 minutes. 
          4. Pour in the wine and simmer until reduced by about one-third. Stir in the rice and 1 3/4 teaspoons salt; add just enough water to cover the rice completely, 2 1/2 to 3 cups. Increase the heat to high and boil for 2 to 3 minutes.
          5. Scatter the green beans and 2 tablespoons capers over the rice. Remove the pan from the heat and arrange the tomatoes on top; drizzle with any tomato juices.
          6. Transfer the paella to the oven and bake, undisturbed, for 20 minutes. Scatter the remaining 2 tablespoons capers and the peppers over the paella. Turn off the oven but leave the paella inside to continue cooking until the rice is tender, 15 to 20 more minutes. Garnish with parsley, if you'd like! 

          THE VERDICT:

          Vic: "
          The recipe is enough to feed an army. It works great on it's own. It's incredibly flavorful (as long as you remember to season with each added layer of vegetable) and a great way to get even your kids to eat veggies!"

          "Amanda: "Pie-YAY-uh!!"


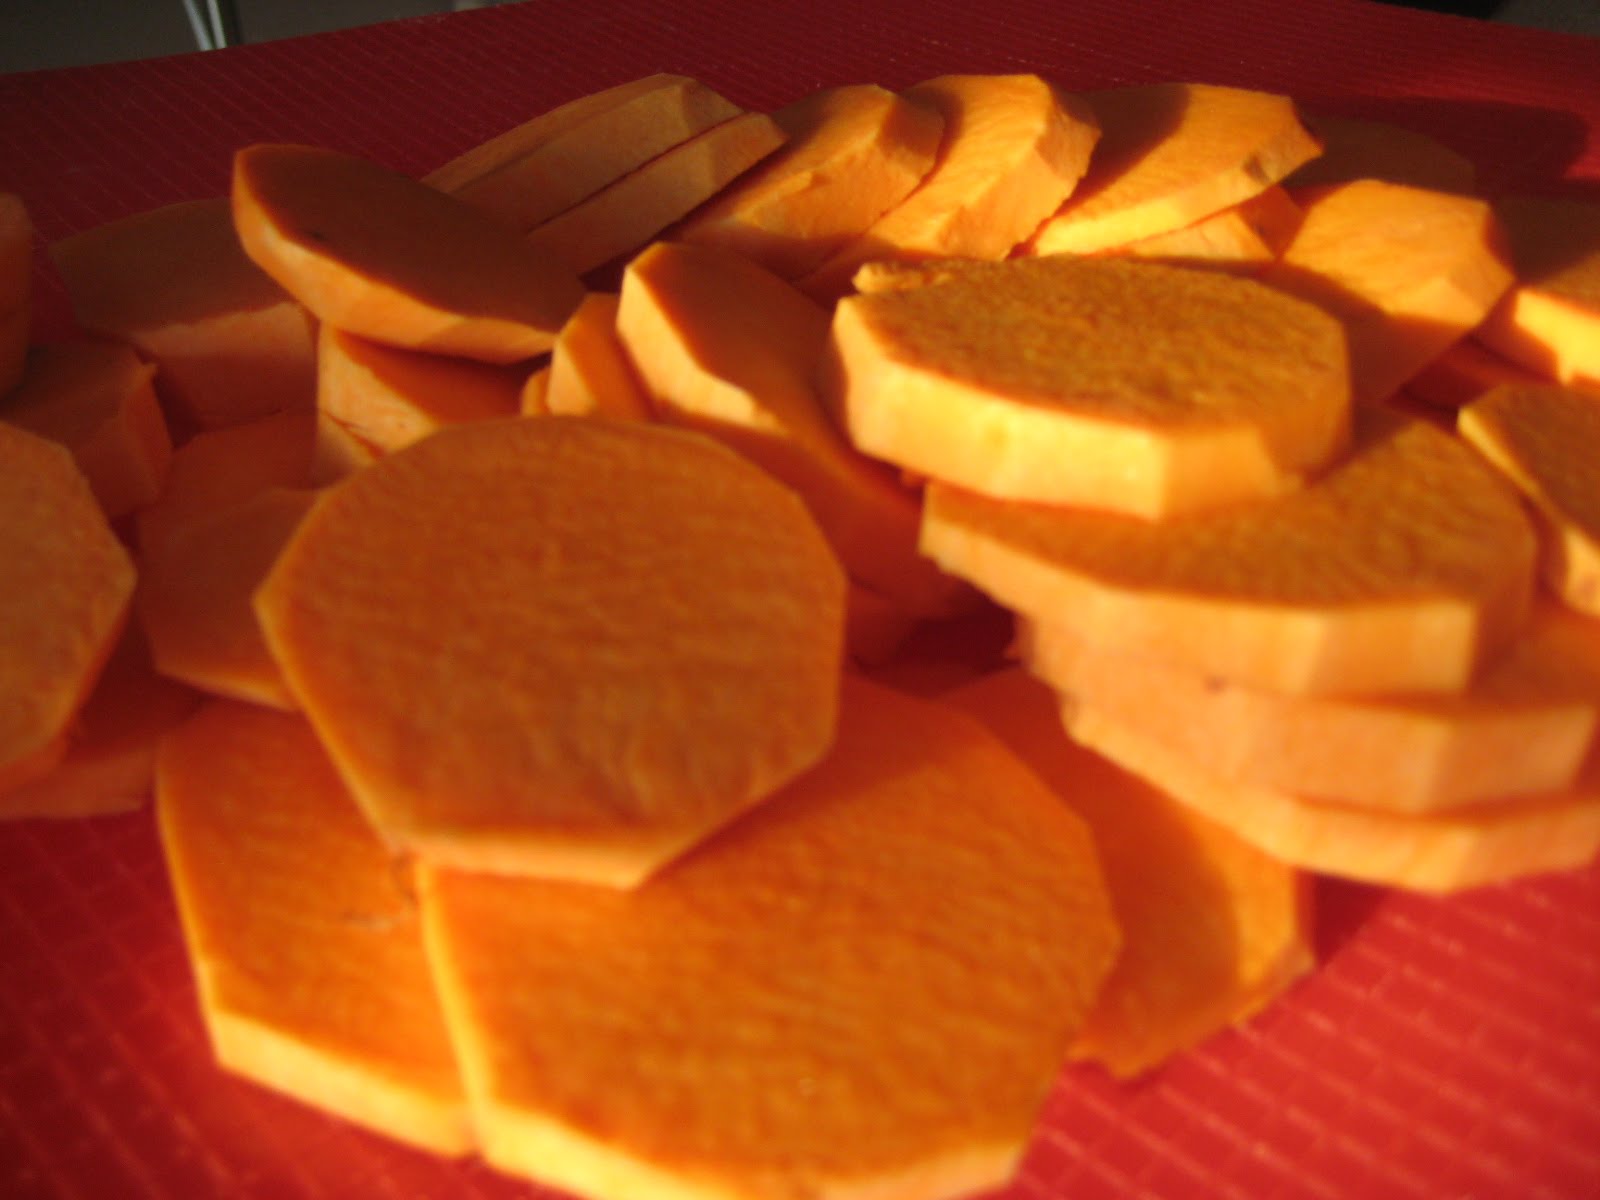
          Sweet Potato & Black Bean Burritos
          We've been making these for a long time and
          they're absolutely delicious!

          • 5 cups peeled cubed sweet potatoes
          • 1/2 teaspoon salt
          • 2 teaspoons canola or other vegetable oil
          • 3-1/2 cups diced onions
          • 4 large garlic cloves, minced or pressed
          • 1 Tablespoon minced fresh green chile (I left this out)
          • 4 teaspoons ground cumin
          • 4 teaspoons ground coriander
          • 4-1/2 cups cooked black beans (three 15-ounce cans, drained)
          • 2/3 cup lightly packed cilantro leaves
          • 1 cup shredded cheddar jack cheese
          • 2 Tablespoons fresh lemon juice
          • 1 teaspoon salt
          • 8 eight-inch flour tortillas
          • Fresh tomato salsa or jarred (optional)
          • Sour cream (optional)

          Preparation:

          Preheat the oven to 350 degrees F. Place the sweet potatoes in a medium saucepan with the salt and water to cover. Cover and bring to a boil, then simmer until tender, about 10 minutes. Drain and set aside.

          While the sweet potatoes are cooking, warm the oil in a medium skillet or saucepan and add the onions, garlic & chiles. Cover and cook on medium-low heat, stirring occasionally, until the onions are tender, about 7 minutes. Add the cumin and coriander and cook for 2 to 3 minutes longer, stirring frequently. Remove from the heat and set aside.

          In a food processor, combine the black beans, cilantro, lemon juice, salt, and cooked sweet potatoes and puree until smooth. (You can also mash the ingredients in a large bowl by hand using a potato masher. The result will be a less smooth but nicely textured filling.) Transfer the sweet potato mixture to a large mixing bowl and mix in the cooked onions and spices.

          Lightly oil a large baking dish. Spoon about 2/3 to 3/4 cup of the filling in the center of each tortilla, sprinkle some cheese on top, roll it up, and place it, seam side down, in the baking dish. Cover tightly with foil and bake for about 30 minutes, until piping hot. Serve topped with salsa &/or sour cream.  

          THE VERDICT:

          Vic: "
          I'm pretty sure that if you left the coriander leaves out, the sweet potato mixture would be good for freezing if you have leftovers or make up extra on purpose. Amanda loves to take them to work for lunch.  It's also a great meal to make for friends as you can make it way ahead and just heat them up in the oven." 

          Amanda: "I love these - oldies but godies!!"

          Monday, April 26, 2010

          Tomato Frustration......

          I'm a little behind on my posting!!  However, I do have a bunch of new yummy recipes that I'm gonna post soon!!


          However, in my quest to find the best veggie recipes out there, I've been cooking with A LOT of diced tomatoes.  I've always used Muir Glen Organic tomatoes as those have the best taste and they're organic.  Sadly, they are lined with BPA.  So I emailed them and I asked why they use BPA and not just package in glass containers.  Are you wondering what BPA is?  Ok, here we go.......

          Bisphenol A, also known as BPA has been under scrutiny as hazardous to humans since the 1930s. Yet it wasn't until 2008, after several governments issued reports questioning its safety, that some retailers removed products made of it from their shelves.

          What is BPA and why should you avoid it?
          Bisphenol A (BPA) is a synthetic estrogen used to harden polycarbonate plastics (used in some baby bottles, and bottled water) and in the epoxy resin used can linings. It was found in the bodies of 93 percent of the Americans tested by the Centers for Disease Control (CDC). In laboratory tests, trace BPA exposure has been shown to disrupt the endocrine system.

          The endocrine system influences almost every cell, organ, and function of our bodies, and is instrumental in regulating mood, growth and development, tissue function, metabolism, and sexual function and reproductive processes. Disruption of the endocrine system triggers a wide variety of disorders, including chromosomal and reproductive system abnormalities, cancer, cardiovascular system damage, adult-onset diabetes, obesity and resistance to chemotherapy.

          As with many toxic chemicals, infants and young children are at the greatest risk of harm because their bodies are still developing. The National Toxicology Program has expressed concern that children’s exposure to BPA may lead to problems with brain and reproductive system development and behavior. The Environmental Working Group (EWG) has compiled this list to help you avoid BPA exposure.

          Limit your exposure to BPA from canned foods and plastic containers:
          • Almost all canned foods (including canning jars) sold in the U.S. have a BPA-based epoxy liner that can leach BPA into the food inside. Pregnant women and young children, especially, should limit their consumption of canned foods to avoid BPA. (If you’re feeding your baby infant formula, use powdered formula because it has the least BPA.)
          • Buy fresh or frozen vegetables instead of canned.
          • For canned veggies and fruits, choose glass bottles where available; the lids may contain BPA but less than cans.
          • For canned beans, choose Eden Foods brand because the cans are BPA-free (Cool, right?!)Or soak and cook dried beans; It’s a little more work but it also costs less.
          • Rinsing canned fruit or vegetables may reduce the amount of BPA you ingest.
          • Make a special effort to avoid canned prepared foods like pastas and soups.
          • Use glass or a BPA-free plastic baby bottles.
          • Avoid polycarbonate containers (marked with a #7 or ‘PC’), especially for children’s food and drinks.
          • Use glass incstead of plastics. However, plastics marked with a #1, 2, 4, and 5 don’t contain BPA and are generally safer for food.
          • Don’t microwave plastics or fill them with hot liquids.
          • Wash plastics on the top shelf of the dishwasher, where the water is cooler, or by hand.
          • Avoid old, scratched water bottles.
          • Use stainless water bottles without plastic linings.
          • Buy fresh to minimize packaging
          For more info: 
          The Environmental Working Group (EWG) recommends eating foods that have been processed as little as possible. Processing techniques detract from nutritional value, and chemicals from food packaging can leach into what you’re eating. For food packaging, EWG recommends avoiding bisphenol A (BPA) and the Teflon and Scotchgard family of perfluorochemicals (PFCs).
          Visit Bisphenolafree.org to learn more.
          I'It took about 3 weeks to get a response from Muir Glen in regards to my inquiry.  They didn't really answer it but here's what they had to say:

          Dear Valued Consumer,

          Thank you for contacting Muir Glen regarding bisphenol-A in food packaging. Bisphenol-A is a critical component of protective coatings used with metal food packaging and provides important quality and safety features to canned foods.

          Scientific and government bodies worldwide have examined the scientific evidence and consistently have reached the conclusion that BPA is not a risk to human health. Recent examples include comprehensive risk assessments in Japan and Europe and a review by an independent panel of experts organized by the Harvard Center for Risk Analysis. The can coatings used in Muir Glen packaging comply with the U.S. Food and Drug Administration requirements for use in food contact applications. These coatings have long played an essential part in food preservation, helping to maintain wholesomeness, nutritional value, and product quality.
          We work closely with our suppliers to ensure that all of the food ingredients and packaging materials we use are fully in compliance with U.S. Food and Drug Administration requirements and meet our high quality standards.
          We will continue to monitor this situation. If you have any further questions, please feel free to contact us. Your questions and comments are always welcome. For more information on the safety of metal food containers, the U.S. Food and Drug Administration press office may be contacted at (301) 436-2335.
          Sincerely,
          Bobbi Hart
          Consumer Services

          Kinda seems pointless to put an organically grown product in a can laden with BPA. Guess it's time to suck it up and dice my own tomatoes!!!

          Monday, April 19, 2010

          Days 7 & 8 Vegetable Frittata with Hummus & Black Olives (4.11 & 4.12)


          Life has been a bit nutty lately with running the business (Lotions & Potions) and trying to take advantage of the BEAUTIFUL weather we've had this week!  After having pizza last Saturday night, I definitely wanted to make something from scratch on Sunday night for dinner.

          I have been craving a GOOD quiche when I came across this recipe for a Vegetable Frittata with Hummus & Black Olives (all things I love!)  Especially black olives. I never used to like them but now I'm the person that gets extra black olives on my veggie sub from subway :-)  Anyhow, I started wondering what the difference was between a frittata and quiches.  I know that generally speaking, a quiche has a crust although there are some quiches that don't.  So I wanted to see what the difference was and here's what I found.........

          Frittatas

          Lesser known in the United States, this is more or less the Italian version of an omelet. Because of the way it is cooked, I think it is more versatile, as it can be easily eaten later, and even frozen. Several portions are usually cooked at once, in just a little more time than it takes to cook an omelet. There are several techniques, but I like a quick one that starts on the stove and finishes in a few minutes under the broiler.

          Yummy Tip: Small cubes of cheese in a frittata will melt during cooking and create yummy little cheese pockets!!!

          Quiches

          A quiche is essentially a baked custard (savory rather than sweet) in a pie shell –- although you can certainly make one without the crust, as I have done before for less calories & fat. It usually includes cheese, as well as other ingredients. Since it is a custard, it is more delicate in consistency than a frittata. This is because it is made with more liquid than eggs, traditionally 2 to 3 eggs per cup of liquid (traditionally cream), although you see recipes with more eggs.

          Helpful Tip: The trick with quiche is how to preserve the delicate texture. This is achieved by removing it from the oven while it is still a bit uncooked in the center; it will continue to cook when removed from the heat. Overcooked quiche has a “tough,” cracked texture around the outside.

          So I decided I was going to make a Frittata for dinner and couldn't wait to dig in!!!  Plus, I finally had an excuse to use a cast iron skillet I've had for years!!  Here's the recipe:

          Ingredients

          • 1 teaspoon olive oil
          • 1/2 cup chopped onion
          • 1 clove garlic, minced
          • 1/2 cup diced green bell pepper
          • 1 zucchini, halved lengthwise and cut in 1/4 inch slices
          • 2 cups cooked and sliced sweet potatoes                    
          • 1 medium eggplant
          • 1 cup chopped fresh tomato
          • 2 tablespoons black olives
          • 4 eggs
          • salt and pepper to taste
          • 1/4 teaspoon dried oregano
          • 1 pinch cayenne pepper (I skipped this as I think cinnamon gum is spicy....)
          • 1/2 small tomato, sliced
          • 1/4 cup shredded mozzarella cheese
          • 1/4 cup grated Parmesan cheese
          • Yummus Hummus (see recipe from day 1)

          Directions

          1. Preheat the broiler on your oven.
          2. In a frying pan with an ovenproof handle (I used my cast iron skillet), heat the oil and saute onion, garlic and green bell pepper over a low heat. Saute until vegetables are just tender but not browned. Add the zucchini and continue cooking, stirring occasionally, until crisp-tender. Add the potatoes, stir well to combine, and continue cooking, stirring frequently, until the potatoes are heated through and starting to stick to the pan. 
          3. Add the tomatoes and black olives, stirring well to combine with the other ingredients, and cook just until the tomatoes have begun giving up their    juice.  Remove from pan.
          4. Brown eggplant on both sides until golden brown on both sides. 
          5. Then put the onion/pepper/zucchini/potato/olive/tomato mixture back in to the pan on top of the eggplant.
          6. Beat the eggs with the salt, pepper, oregano, and cayenne.  Pour the eggs over them
          7. Arrange the tomato slices over the top of the eggs, and sprinkle the mozzarella and Parmesan cheeses over the tomato slices. Cook gently over low heat until the eggs are almost set (they'll be firm around the edges and a bit runny in the middle).
          8. Slip the pan under the broiler for a two or three minutes, until the eggs are fully set and the cheese has melted and begun to brown.  Let cool and flip onto plate. Cut into wedges or squares.  Top with Yummus Hummus!

          THE VERDICT:

          Vic: "
          Don't skimp on the spices! This came out a little bland.  And the broiling step is essential---brown that cheese! I used fresh oregano on top after it came out of the broiler and that added alot. Don't be afraid to add some strong flavors to this. "

          Amanda: "Eggy but filling.  Better with hummus."

             Day 8 was SUBWAY - eat fresh!! :-)