Recipes, Tales and the Journey of a Vegetarian


Friday, October 22, 2010

Vegetarian Shepherd's Pie

COMFORT FOOD!!  Here's an amazing recipe that is a delicious, savory, meatless meal that will stick to your ribs.  The "Boca" crumbles in the dish would fool even the most devoted carnivore!  Perfect for the fall/winter weather headed our way!!

Vegetarian Shepherd's Pie

Ingredients

  • 8 large potatoes, peeled and quartered
  • 2 carrots, sliced
  • 1 (16 ounce) package frozen mixed vegetables, thawed
  • 1 package meat substitute crumbles (like Boca)
  • 1/2 teaspoon garlic powder
  • 1/2 teaspoon dried basil
  • 1/2 teaspoon dried parsley
  • 3 tablespoons butter
  • 1/4 teaspoon salt
  • 1/4 teaspoon ground black pepper
  • 6 tablespoons milk
  • 1 onion, chopped
  • 1 teaspoon vegetable oil
  • 1 (19 ounce) can kidney beans, drained
  • 1 (14.5 ounce) can diced tomatoes, drained
  • 1 (8 ounce) can tomato sauce
  • 1 teaspoon soy sauce
  • 1/2 teaspoon white sugar
  • 1 cup shredded Cheddar cheese
  • 1/2 teaspoon paprika

Directions

  1. Preheat oven to 375 degrees F (175 degrees C).
  2. Cook potatoes, covered, in a small amount of boiling water until tender. Drain and mash.
  3. While potatoes are cooking, steam or boil carrots and mixed vegetables until near tender. Drain and set aside.
  4. In a small saucepan, cook garlic powder, basil and parsley in butter or margarine for about 20 seconds (or microwave for 10 seconds). Stir into mashed potatoes along with salt and pepper. Gradually beat in enough milk to make potatoes light and fluffy, add a little more milk if necessary. Set aside
  5. In a medium saucepan, cook onion in oil until tender but not brown. Stir in boca crumbles, kidney beans, tomatoes, tomato sauce, soy sauce, sugar and vegetable/carrot mixture. Heat through until bubbly.
  6. Transfer vegetable mixture to a 8x8x2 inch baking dish. Drop mashed potatoes in mounds over the top. Sprinkle with cheese and paprika. Bake, uncovered at 375 degrees F (175 degrees C) for 30 minutes. 
NUTRITION INFO:  Amount Per Serving  (serves 6) Calories: 386 | Total Fat: 8.4g | Fiber: 21.4g | Cholesterol: 36mg

Wednesday, October 20, 2010

What your body does within 1 hour of drinking soda......

In my current quest to become a Certified Nutritionist I've become even  more aware of our world of food and drink.  I want to know what happens IN our bodies once we consume something as well as how the item being consumed is made.  So in my constant search for a healthier lifestyle for my family and I, I started looking into the expansive world of soda.  While my kids don't drink it (in fact, the one time my daughter tried it, she thought it was disgusting and spicy.......) My partner and I do on occasion. Now, everyone knows what soda is, right??  A soft drink (also referred to as soda, pop, soda pop or fizzy drink) is a non-alcoholic beverage typically containing water and a flavoring agent. Many are carbonated and sweetened, and may contain additional ingredients such as fruit juice. Small amounts of alcohol may be present, but the level would generally remain under 0.5% of the total volume for the drink to be considered non-alcoholic. Soft drinks are most often consumed chilled, and sometimes at room temperature.


I've always wondered why soda is called a "soft drink."   Wikepedia explains that "The adjective "soft" is employed in opposition to "hard", the latter being used in reference to drinks with a high alcohol content. Further, soft drinks are not thought of as containing milk or other dairy products."  Many carbonated soft drinks sweetened with sugar or high fructose corn syrup and are available in diet versions sweetened instead with non-caloric sweeteners.

Now don't get me wrong, I do enjoy pop.  But I also feel like if it's regular, NON-diet soda it's like fat-building-crack-in-a-can and if it's DIET, it's cancer-in-a-can.  So as good as it may be in all of its deliciousness, I think it's time to give it the boot.    

According to the Nutrition Research Center, this is what happens to your body within 1 hour of drinking a can of soda:
 -10 minutes: 10 teaspoons of sugar hit your system, which is 100 percent of your recommended daily intake. You’d normally vomit from such an intake, but the phosphoric acid cuts the flavor.
-20 minutes: Your blood sugar skyrockets. Your liver attempts to maximize insulin production in order to turn high levels of sugar into fat.
-40 minutes: As your body finishes absorbing the caffeine, your pupils dilate, your blood pressure rises, and your liver pumps more sugar into the bloodstream. Adenosine receptors in your brain are blocked preventing you from feeling how tired you may actually be.
 -45 minutes: Your body increases dopamine production, causing you to feel pleasure and adding to the addictiveness of the beverage. This physical neuro response works the same way as it would if we were consuming heroin.
>60 minutes: The phosphoric acid binds calcium, magnesium and zinc in your lower intestine, which boosts your metabolism a bit further. High doses of sugar and artificial sweeteners compound this effect, increasing the urinary excretion of calcium. The caffeine’s diuretic properties come into play. (You have to GO!) Your body will eliminate the bonded calcium, magnesium and zinc that was otherwise heading to your bones. And you will also flush out the sodium, electrolytes and water. Your body has eliminated the water that was in the soda. And in the process it was infused with nutrients and minerals your body would have otherwise used to hydrate your system or build body cells, bones, teeth.
-60 minutes: The sugar crash begins. You may become irritable and/or sluggish. You start feeling like crap.

Time to grab another?

Wednesday, September 22, 2010

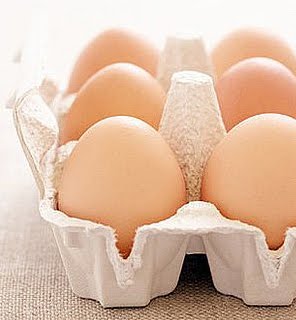
The "Eggsperience"

So I've done a lot of research into the wonderful world of EGGS.  While I hardly eat them (I really only use them in baking......) I can't seem to cut them completely out of my life.  It's quite possible that I'm just not trying hard enough as there are many alternatives.  And while I do feel guilty every time I crack an egg open,   I rationalize to myself that they're "free-range" or "cage free."  I'm here to inform you that there is a BIG distinction between the two.

I've had a few people proudly tell me that they only buy cage-free eggs and free-range poultry.  After all of the info I've found, I'm interested to hear what people say they think these terms mean.  As I expected, all of them had images in their heads of green pastures, with plump, clucking chickens running about, and big, red barns in the back drop. Okay, so no one described the barn, I just thought it fit with the images they'd created. Anyway, after realizing the knowledge deficit that exists surrounding the definition of the terms free-range and cage-free, I decided to devote this entry to dispelling the myth behind them. A myth, perpetuated by the meat industry, that provides consumers with a false sense of comfort regarding the care and consideration of chicken and other poultry on factory farms. 
 
Let me begin by citing the USDA's definition of the terms. First, there is no legal definition for the term "cage-free." The USDA has no regulatory policy regarding cage-free eggs. Usually, cage-free eggs are ones that come from hens that, instead of being kept in overcrowded cages, are housed in large overcrowded sheds. Typically, there are so many birds packed in one of these sheds that the hens are unable to flap their wings. These birds still have their beaks cut off with a hot blade and no pain killers. They live in sheds soaked with urine and shuffle around in their own feces. Most often, sick birds are left to die because they receive no veterinary care (providing veterinary care costs the farmer more than replacing the bird does). After they've died, their corpses are left to rot in the shed alongside the egg-laying hens that provide the consumers with cage-free eggs.  

Unlike the term "cage-free," the USDA does have a requirement that must be met in order to earn the certification of "free-range." According to USDA policy, in order to be certified as free-range, birds must be raised with access to the outdoors and provided a traditional high-protein diet. The policy states that the birds may be temporarily confined for reasons of health, safety, the animal's stage of production, or to protect soil or water quality. For many free-range chickens, the access to the outdoors they receive is when they are transported to the windowless chicken sheds and then again when they are removed from the shed for slaughter. The USDA offers no specifications as to how much outdoor exposure the birds must receive nor is there any way to enforce such a requirement even if it was mandated. Also, it is important to note that male chickens born on cage-free or free-range farms suffer the same fate as the ones born in the battery cages, that is, the male chickens are killed because they cannot lay eggs and are of no use to egg-producing farmers. The male chickens are usually killed in one of three ways- They are crushed to death, literally, like the way my brother used to squash aluminum cans. They are thrown in large plastic bags and suffocated to death. Or, they are thrown, still alive, into a grinder to be processed as feed. 

So what's a consumer supposed to do if he/she doesn't want to give up eggs but doesn't want to support the cruel industry of factory egg production? The best but not always possible choice?? Find a local farmer. Go see the chickens who'll provide you with your eggs. See where they're housed, what kind of physical condition they're in, if their beaks are intact or have been cut off. By the way, farmers trim the beaks of chickens because when kept in such unnaturally close quarters, the chickens will peck each other to death. If you visit a farm and the chickens have had their beaks trimmed, go somewhere else. 

The next best thing is to try to buy eggs from a farmers market.  If that's not possible then switch from commercially raised eggs to buying those labeled "Certified Humane," "American Humane Certified," or "Animal Welfare Approved." This means your eggs came from chickens raised with care, not confined to battery cages and stuffed with weird growth hormones or antibiotics. And these three designations are verified and monitored by animal rights organizations. In other words, they have some oomph behind them, unlike popular claims like "cage-free," which does not.

Most importantly, do your own research. The facts are out there, you just have to want to find them - I know I did!!!  I guess that would make me an "Eggspert??" ;-)

Monday, August 16, 2010

Yummy in our tummy!

Here are some new recipes that we just LOVE!!  I love to hear feedback so if you give them a whirl, let me know how you like them.  If you try something different or find a trick that works for you, let us all know!!

The recipes featured in this post are:
  • Spinach & Artichoke Pasta
  • Tomato & Basil Tart (we just had that tonight and it was out of this world!!)
  • Almond Poppyseed Bars
The recipes are in this order so scroll down to get the ones you like!

Spinach & Artichoke Pasta
Ingredients

  • 1 pound semolina or whole wheat penne
  • 2 tablespoons Olive Oil
  • 3 tablespoons butter
  • 1 medium onion, finely chopped
  • 3 cloves garlic, finely chopped or grated
  • 3 tablespoons flour
  • 1/2 cup white wine
  • 2 cups milk 
  • Salt
  • Freshly grated nutmeg, about 1/4 teaspoon or to taste
  • 1 10-ounce box frozen chopped spinach, defrosted and wrung dry in a kitchen towel
  • 1 10-ounce box frozen chopped artichokes, defrosted and wrung dry in a kitchen towel
  • Black pepper
  • 1 1/2 cups shredded Italian Fontina cheese, plus additional for sprinkling on top
  • 1 1/2 cups grated Parmigiano Reggiano cheese, plus additional for sprinkling on top

    Yields: 4 servings

    DIRECTIONS

    Bring a large pot of water to a boil for pasta, salt water and cook pasta to al dente.
    While the pasta water comes to a boil, place a medium pot over medium-low heat with 2 turns of the pan of olive oil, about 2 tablespoons, and the butter. Add the onion and garlic to the pan and cook the veggies until very soft, about 10 minutes. Then heat the broiler and position rack in the middle of the oven.

    Turn the heat up to medium-high and sprinkle the flour into the pan. Cook for about 1 minute then whisk the wine into the pan, cooking for another minute to burn off the alcohol. Whisk the milk into the pan and bring up to a bubble. Add the nutmeg, spinach, artichokes, salt and pepper to the sauce and simmer until thickened and vegetables are warmed through, 2-3 minutes more. Add 1 cup of each of the cheeses to the sauce and stir until melted.

    Tomato & Basil Tart
    This dish actually doesn't have that many ingredients
    but the flavor is amazing!!!


    • Ingredients

    • 2/3 cup whole wheat flour
    • 1/3 cup all-purpose flour
    • 1/2 cup cold butter
    • 4 to 5 tablespoons cold water
    • 6 ripe tomatoes - sliced
    • 3 cups (12 ounces) fresh mozzarella cheese
    • 2 crushed garlic cloves
    • 1/2 cup fresh basil leaves, dipped in olive oil
    • 4 tablespoons olive oil
    • 1/4 teaspoon salt
    • 1/8 teaspoon pepper

      Directions

      • In a large bowl, combine the flours; cut in butter until crumbly. Gradually add water, tossing with a fork until dough forms a ball. Cover and refrigerate for 30 minutes or until easy to handle. If you're short on time, **YOU COULD ALSO USE A REFRIGERATED PIE CRUST**
      • On a lightly floured surface, roll out pastry to fit a 9-in. fluted tart pan with a removable bottom. Transfer pastry to pan; trim even with edge. Bake at 350° for 13-15 minutes or until lightly browned. Meanwhile, thinly slice the tomatoes; place on paper towels to drain.
      • Slice mozzarella cheese and layer onto the crust; top with tomatoes arranging the slices in a slightly overlapping pattern around edge of tart. Sprinkle garlic over tomatoes & cheese.
      • Drizzle with oil; sprinkle with salt and pepper.
      • Bake for 30-35 minutes or until crust is crispy and cheese is melted. Let stand for 15 minutes before serving. Yield: 6-8 servings.
      LEMON POPPYSEED BARS

      Ingredients

      • 3 eggs
      • 2 1/4 cups sugar
      • 1 1/2 cups milk
      • 1 cup vegetable oil
      • 1 1/2 teaspoons almond extract
      • 1 1/2 teaspoons vanilla extract
      • 1 1/2 teaspoons butter flavoring or additional vanilla extract
      • 3 cups all-purpose flour
      • 4 1/2 teaspoons poppy seeds
      • 1 1/2 teaspoons baking powder
      • 1 1/2 teaspoons salt
      • FROSTING:
      • 1/3 cup butter or margarine, melted
      • 3 cups confectioners' sugar
      • 3 tablespoons milk

      Directions

      1. In a mixing bowl, beat the eggs, sugar, milk, oil, extracts and butter flavoring. Combine the flour, poppy seeds, baking powder and salt; add to the egg mixture and mix just until combined. Spread into a greased 15-in. x 10-in. x 1-in. baking pan. Bake at 350 degrees F for 20 minutes or until a toothpick inserted near the center comes out clean. Cool on a wire rack.
      2. In a mixing bowl, combine the frosting ingredients; beat until smooth. Frost bars.

      Wednesday, July 28, 2010

      Raising Vegetarian Children in a Meaty World.....

      Recently, our daughter came to us and asked what meat was.  We told her plainly and simply that it is an animal.  It all started because she was very upset by seeing the fish at the seafood counter.  She said, "Why are they sad?" as all the fish had frowns - it's true! While explaining this to her, we didn't want to freak her out about but at the same time, tried to explain to her why WE don't eat meat.   It's a tricky subject to tackle at this age.  We just want to teach our kids that animals are living, breathing, sentient beings. Teach compassion and respect.  They don't need to know about mistreatment, etc at this age nor do we want them to judge others for eating meat.  Just this afternoon, my almost 4 year old daughter was playing in her kitchen and she began to serve up cows and chickens from her puzzles on her tiny play plates as a joke, handing them to me and then giggling, “we don’t eat ANIMALS mommy!” As if the concept was so foreign it was laughable.


      Trying to reiterate that it's a personal decision and steering from saying things like, "eating meat is mean," or "we don't eat animals because it's not nice or because it hurts them"  isn't a message we want to send as many loved ones in our lives DO eat meat.   We just believe that if we teach them to love animals and not to think of them as "things" to be used, being vegetarian should be a natural choice for them...or so we hope.  I've never been one to force my beliefs on anyone, so if our children grow up to have a taste for meat, I will not protest.  On the other hand, some kids grow up with meat-eating parents and choose to be a vegetarian (like me!) Now, I was lucky- my mom was extremely supportive and provided plenty of alternative proteins and salads. Not all parents share that view, unfortunately, and even forced their children to eat meat (sometimes, by adding meat juice to otherwise vegetarian meals to trick their children.)


      Another concern we run into is making sure our kids are getting a balanced diet.....which is tricky enough as little kids an be such picky eaters.   One needs to make sure that your child is getting the vitamins and nutrients they need.  If one does their homework, raising a child as a vegetarian can be easy as there are other ways to get protein without spending tons of money (beans, nuts, etc..) Here are some tips to make sure your child's veggie diet is on track......
      • Understand what foods need to be substituted in the diet as energy, protein and vitamin sources may need to be ‘topped up’.
      • Encourage your child to eat a wide variety of foods.
      • Alternate wholegrain and refined cereal products.
      • Combine lower energy vegetarian foods, such as vegetables, with higher fat foods: for example, vegetable fritters.
      • Increase the energy value of food by the use of nut butters, avocado, full fat dairy products, fat spreads and oils.
      • Give your child regular meals and snacks.
      • Combine foods containing vitamin C with foods that are high in iron. For example, offer an orange with baked beans on toast. Vitamin C enhances the absorption of iron.

      Now we are united on the dietary front as a family, and I am beyond thrilled.  My partner has been doing an amazing job sticking to the veggie lane (going on 4 months!) and really think that watching Food, Inc and reading "Eating Animals" was key.  If you haven't seen or read these items, do!!

      Raising healthy vegetarian children is possible and is not difficult once a parent has done some simple research. Each person who chooses to become a vegetarian should do his or her own research. Take your standard food chart and simply substitute vegetarian or vegan alternatives making sure your child gets the recommended number of servings. When looked at in this way, it becomes clear that the task at hand is really no more difficult than feeding your average picky toddler. Resources exist in many forms available to anyone willing to peruse the magazine or nutrition/cookbook section of the local bookstore, spend an evening surfing the Internet, or contact a local national vegetarian organization. A vegetarian diet for children can not only be adequate but also abundantly healthful.

      Saturday, July 3, 2010

      The Search Is Over......

      ....for a delicious, easy, zucchini bread recipe :-)  I'm happy to say I have found a recipe that lives up to my idea of what these this bread should taste like!


      While shopping at the Farmers Market last week, I bought some 'golden' zucchini as well as some green.  Having an overabundance of them (how can you say no to HUGE homegrown zucchini 2 for $1?! Ok. I guess one could.  But not I!) I had to figure out what to do with all of it.  I threw it in every dish I could throughout the week and still had a bunch left over.  Fresh zucchini should be used up within 5 days. You can freeze it by peeling off the skin and shredding the pulp.  Measure out 2 cups of pulp and place in a zipper closure bag. Purge the air out of the bag and seal shut.  However, I didn't feel like freezing it so, I decided to give zucchini bread another shot.  I've tried other recipes in the past only to find them dry, bland and never 'zucchini' tasting.  But this one I tried today is a keeper!! 

      Zucchini bread is made with shredded zucchini and a number of other ingredients that provide a sweet flavor and moist texture. I used the Golden Zucchini which has a mild, sweeter taste than the green. There are many variations of zucchini bread and some are savory rather than sweet, due to ingredients such as cheese and chopped onions. Like many other quick breads, zucchini bread is often served as a dessert bread or breakfast item.

      I have also found that with many homemade baked breads, they are sooo much better the next day.  Wrap them up (once cooled) in some foil and stick them in a ziplock bag or another airtight container.  The bread will be super moist, soft and delish!!  You can also freeze completely baked loafs by wrapping them in plastic wrap followed by aluminum foil. Label and freeze for up to 3 months.


      Golden Zucchini Bread

      Ingredients

      • 2 cups all-purpose flour
      • 1 cup whole wheat pastry flour (or if you don't have this on hand, all-purpose is fine)
      • 1 teaspoon salt
      • 1 teaspoon baking soda
      • 3 teaspoons ground cinnamon
      • 1/4 teaspoon baking powder
      • 3 eggs
      • 2 cups white sugar
      • 3 teaspoons vanilla extract
      • 1 cup vegetable oil
      • 3 cups grated green or golden zucchini
      • 1 cup chopped walnuts (optional)

      Directions

      1. Preheat oven to 350 degrees F (175 degrees C).
      2. Sift together flour, salt, soda, cinnamon, baking powder.
      3. Beat eggs. Add and mix well sugar, vanilla, and oil. Add zucchini to egg mixture. Add dry ingredients, mixing well. Stir in nuts if desired. Pour into 2 ungreased loaf pans.
      4. Bake at 350 degrees F (175 degrees C) for 1 hour.

      Tuesday, June 15, 2010

      Cupcakes are vegetarian too!!!

      Last night I was thinking, "Why don't I include some sweet recipes on the blog?? After all, baking IS one of my passions!"  Plus, unless you're baking meat pies, most desserts are vegetarian......SCORE!

      I tend to be a baking snob. Most of the time, I'd rather bake it myself than go to another disappointing bakery.  Nothing gets under my skin like spending a good amount of $$ at a bakery only to find I could've made it better. (Yes, I know.....I'm tooting my own horn....)

      A friend of mine messaged me asking for some recommendations for cupcake recipes for her daughters upcoming 2 year birthday.   Since I just made RED VELVET cupcakes yesterday, I thought I'd pass the yumminess along to you all!  Also, I've included a favorite recipe of Amanda's, Carrot Cupcakes with White Chocolate Cream Cheese Frosting.  TO. DIE. FOR.

      Enjoy!!!


      RED VELVET CUPCAKES WITH CREAM CHEESE FROSTING
       Ingredients
      (Makes 24 servings)
      • 2 1/2 cups cake flour
      • 1/2 cup unsweetened cocoa powder
      • 1 teaspoon baking soda
      • 1/2 teaspoon salt
      • 1 cup butter, softened
      • 2 cups sugar
      • 4 eggs
      • 1 cup sour cream
      • 1/2 cup milk
      • 1 (1 ounce) bottle Red Food Color (like McCormick)
      • 2 teaspoons Vanilla Extract
      • Vanilla Cream Cheese Frosting:
      • 1 (8 ounce) package cream cheese, softened
      • 1/4 cup butter, softened
      • 2 tablespoons sour cream
      • 2 teaspoonsVanilla Extract
      • 2 cups Confectioners Sugar

      Directions

      1. Preheat oven to 350 degrees F. Mix flour, cocoa powder, baking soda and salt in medium bowl. Set aside.
      2. Beat butter and sugar in large bowl with electric mixer on medium speed 5 minutes or until light and fluffy. Beat in eggs, one at a time. Mix in sour cream, milk, food color and vanilla. Gradually beat in flour mixture on low speed until just blended. Do not overbeat. Spoon batter into 30 paper-lined muffin cups, filling each cup 2/3 full.
      3. Bake 20 to 25 minutes or until toothpick inserted into cupcake comes out clean. Cool in pans on wire rack 5 minutes. Remove from pans; cool completely. Frost with Vanilla Cream Cheese Frosting.
      Vanilla Cream Cheese Frosting
      Beat cream cheese, softened, butter, sour cream and Vanilla Extract in large bowl until light and fluffy. Gradually beat in confectioners' sugar until smooth.  Yummmm!!!
       ____________________________________________
      CARROT CUPCAKES WITH WHITE 
      CHOCOLATE CREAM CHEESE FROSTING 


      Ingredients

      Makes 12 servings

      • 2 ounces white chocolate
      • 1 (8 ounce) package cream cheese, softened
      • 1/2 cup unsalted butter, softened
      • 1 teaspoon vanilla extract
      • 1/2 teaspoon orange extract
      • 4 cups confectioners' sugar
      • 2 tablespoons heavy cream
      • 2 eggs, lightly beaten
      • 1 1/8 cups white sugar
      • 1/3 cup brown sugar
      • 1/2 cup vegetable oil
      • 1 teaspoon vanilla extract
      • 2 cups shredded carrots
      • 1/2 cup crushed pineapple
      • 1 1/2 cups all-purpose flour
      • 1 1/4 teaspoons baking soda
      • 1/2 teaspoon salt
      • 1 1/2 teaspoons ground cinnamon
      • 1/2 teaspoon ground nutmeg
      • 1/4 teaspoon ground ginger
      • 1 cup chopped walnuts

      Directions

      1. Preheat oven to 350 degrees F (175 degrees C). Lightly grease 12 muffin cups.
      2. In small saucepan, melt white chocolate over low heat. Stir until smooth, and allow to cool to room temperature.
      3. In a bowl, beat together the cream cheese and butter until smooth. Mix in white chocolate, 1 teaspoon vanilla, and orange extract. Gradually beat in the confectioners' sugar until the mixture is fluffy. Mix in heavy cream.
      4. Beat together the eggs, white sugar, and brown sugar in a bowl, and mix in the oil and vanilla. Fold in carrots and pineapple. In a separate bowl, mix the flour, baking soda, salt, cinnamon, nutmeg, and ginger. Mix flour mixture into the carrot mixture until evenly moist. Fold in 1/2 cup walnuts. Transfer to the prepared muffin cups.
      5. Bake 25 minutes in the preheated oven, or until a toothpick inserted in the center of a muffin comes out clean. Cool completely on wire racks before topping with the icing and sprinkling with remaining walnuts.  
      6. Eat.....Soooo amazing!!!